How to temper chocolate
What is Tempering?
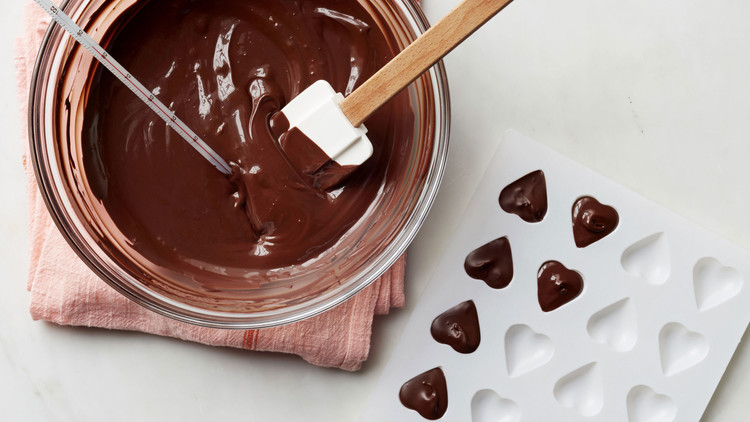
The process involves cooling and melting chocolate until it is smooth and shiny when it is set (for instance, the chocolate-covered strawberry). Chocolate that’s not tempered is usually streaky, gray and soft. Tempering is the key to making chocolate-dipped treats and other sweets. Choose any of the techniques described below.
An instant-read thermometer will be the only instrument you’ll need. The candy products are called “melts,” which allow you to avoid tempering; however, they’re not real chocolate. They’re typically produced using partially hydrogenated oils instead of cocoa butter.
Tempered vs. Untempered Chocolate
When chocolate is properly tempered, it’s smooth and shiny. It gives that distinctive “snap” whenever you cut off a piece after it has set. If the chocolate isn’t properly tempered, it’ll appear dull or streaky and could even be grayish. It won’t break and become difficult to handle. This is why tempering chocolate is an important step in making your chocolate-based treats at home.
Why is melting chocolate not enough?
Suppose you were to melt your chocolate without tempering it before processing. In that case, it won’t produce the same results that create an irresistibly delicious chocolate product. It could take a lengthy period (hours or even) to solidify, and the chocolate’s shell would appear dull and melt quickly. Furthermore, your chocolate will appear a little rubbery rather than having a satisfying crunch when you bite into it and exhibit poor contracting properties, which causes it to break up difficulty.
How to Temper Chocolate?
To temper chocolate, you’ll require:
- 16 ounces of dark chocolate, preferably with an extremely high proportion of cocoa butter
- Double boiler (a stainless steel bowl placed over an oven works) or any pan/skillet with glass bowl on top kept on stove also works
- Rubber spatula
- Candy thermometer
Step 1. Chop the Chocolate
Chop your chocolate into pieces that aren’t bigger than 1/2-inch squares. Then, place two-thirds of your chocolate in a bowl made of stainless steel.
Step 2. Set up the Double Boiler
Fill a saucepan to one-third with water. Place it at a medium temperature and heat to a low simmer.
Step 3. Melt the Chocolate
Reduce the heat to a simmer and set the bowl on top of the pan of boiling water (the bowl should not be in contact with the hot water). Mix the chocolate by hand with a spatula until it is completely melted and appears smooth.
Make sure that the water isn’t boiling too vigorously and that there isn’t any steam dissipating. Any moisture introduced into the water can melt the chocolate and transform it into a smoky and hard mess. If you are only using small amounts of chocolate, it is advised to switch off the heating. Additionally, white chocolate particularly requires careful handling.
Step 4: Check the temperature
Check the temperature of the chocolate. If you want to temper the chocolate, adhere to the temperatures that are recommended below. Be sure not to let the chocolate exceed the temperature you want since it could cause burning.
Step 5: Cool and “Seed” the Chocolate
When the chocolate is at the desired temperature, take the bowl from the oven, dry the bottom, and begin the crucial phase of cooling. We suggest cooling the chocolate through “seeding,” which is considered the most convenient for novices and something we suggest you try at home.

Seeding Method
The seeding process, also known as the inoculation technique, is one of the simplest methods for tempering chocolate.
The first step is to set your double boiler to begin melting chocolate. Chop the chocolate in the same way you normally would when melting chocolate.
When the chocolate is completely melted, add the remaining chopped chocolate to the chocolate that has been melted.
The primary concern will be the temp of the chocolate. When you add the pieces of chocolate gradually, the temperature will drop. Continue mixing until you reach the desired temperature (read below for temperature recommendations).
Once you’ve reached the proper temperature to rest, it is time to heat the chocolate to bring it up to temperature. All you have to do is re-boil the double boiler water and be aware of the temperature. Once you’ve reached a suitable temperature, the water is ready for use!
Check the Temper
Check the temper by submerging it in a knife and then letting it rest for two or three minutes. Tempered chocolate will dry rapidly and will have that distinctive shiny look. If this happens after testing, your chocolate is well-tempered and ready for use!
Are the chocolates still sticky? It’s not temperate. A properly tempered chocolate is supposed to give a firm feel after a couple of minutes. If you find that your chocolate isn’t in a good state, begin at step four.
Using Tempering Machine
This is, naturally, the most straightforward method and the most efficient for large-scale chocolate production. But it is important to note that not all tempering machines are created equal.
Pros
The benefit of this method is its simplicity of use, with minimal training required. It’s also the most efficient method, which means busy bees could be distracted with other projects while the chocolate is almost tempered. Another benefit of the tempering method is that the chocolate tempering equipment varies in size, ranging from compact and small to large. This makes it suitable for various kitchen sizes and even big chocolate producers.
Cons
The method used here isn’t as hand-crafted and hands-on as the traditional techniques, so it could appear less dramatic and dramatic if you’re planning to have an audience for the chocolate you make. It’s also more expensive to purchase tempering equipment than the handheld thermometer, which is why it’s not suitable for everyone’s budget. It also takes up more space than a tempering device occupies, which may not be a good choice for people who only want to play with their hobbies.
Method: Tempering chocolate using a tempering machine is easy to understand and does not require as much effort as other methods. The precise method of doing this will vary based on the particular machine, so be sure to read the directions.
Why does chocolate need to be tempered?
Chocolate’s melting temperature is extremely small and melts between 40 and 50 degrees Celsius. This is why heating the chocolate using insulated water is the most common method to melt chocolate. If the chocolate is heated using direct fire, it’s likely to ignite, and you must be cautious. Its conductivity to heat is quite low, so it has to be broken into uniform pieces to speed up the melting process.
Apart from temperature, the main threat to chocolate is moisture. Mix a little bit of water into the melting chocolate. The water will be absorbed in the chocolate and consolidated into clumps, forming small lumps.
The cocoa butter in chocolate is composed of a range of fatty acids. It begins to soften around 28degC and melts at 33 degrees Celsius. It’s extremely narrow between its melting and freezing point. Do we have it in the palms of our hands, or is it solid and melts in our mouth for a time? Because of our bodies’ temperature, chocolate transforms from liquid to solid. The characteristics of cocoa butter comprise among the most important qualities of chocolate.
The ideal temperature for storage of chocolate is 15-18 degC. When the chocolate has been stored for a certain amount of time, the chocolate’s surface will begin to turn white and appear like a frosty layer. This is known as fat bloom.
The process of crystallizing cocoa butter is often referred to in the form of oil spots. The reason for this is that unstable cocoa crystals melt and are transported to the surface, which is where they re-synthesize. The chocolate must be adjusted. The goal is to create beautiful chocolate. It tastes better at room temperature to avoid oil spots and make it easier to shape.
if you want to know more about chocolate freezing without crystallization so that it maintains its good taste then read this post about the same topic.

Frequently Asked Questions
When should you not temper chocolate?
If the chocolate that has been melted is baked into a cake or a cookie and used as an ingredient, not a coating, it’s not required to be tempered.
Why does my melted chocolate not harden?
It is possible to discard all the chocolate and make new chocolate that is unadulterated and has been properly tempered; however, if the issue is that the chocolate isn’t properly tempered and the changes haven’t affected its characteristics in any way, you may be able to salvage the entire batch by scraping it off your
Does tempered chocolate melt in your hands?
The most straightforward explanation for the results of tempering chocolate is that the melting temperature increases as the chocolate crystallizes and will melt in your mouth but not in your hands.
Why is tempered chocolate shiny?
This is due to tempering. In the process of melting chocolate, you melt the crystals of cocoa. They are the fat that makes chocolate. The problem is that cocoa butter can crystallize again into six types (polymorphs), and only one of them, beta crystals, can harden into shiny, firm chocolate.
Why do you put butter in melted chocolate?
Chocolate is flavored with butter to add fat to mix the chocolate more effectively with extra ingredients. Additionally, it can be used to break open chocolate and thin out liquid chocolate.

I am a kitchen expert and connoisseur of food with decades of cooking experience who loves to cook a variety of scrumptious food item to awaken the taste buds of people who eat my food. I know a lot about kitchen utensils and appliances and here to share my years of knowledge about the best kitchen products with you.
With his gumption, alacrity along with astute acumen to pick the authentic and best quality ingredients from across the world to make the scrumptious recipes which soothes the taste buds of eater has made him the name on which people can count on when it comes to cooking advice, world class meals and cuisines native to the different cities of world.
His unique ability improvise and make dishes with different raw produce and ingredients in less time which are delicious and relished by the guests has made Tushar leader in the arena of cooking.

what is bread machine yeast for bread making

Can You Freeze Vegetable Soup in easy steps
